
Using Azure DevOps to Automate Deploying a Single Page App (SPA) to Azure Storage
Unlike traditional server-side web applications, Single Page Applications (SPAs) are web applications that do not require a server backend. Once the content is delivered to the client browser, the rest of the application is API-driven, and it updates specific page parts without back-and-forth serverside processing to render the application. There are many JavaScript frameworks like React, Angular, or Vue to build such. This blog will not dive deep into each of these frameworks to keep it brief. The build commands and output directory may differ slightly, but the process remains unchanged. This blog will explore the detailed steps deploying the SPA into an Azure storage account, which is the most cost-effective solution to host a SPA.
Prerequisites
1) Choose a JavaScript development framework. The example builds a React SPA sitting under the src\spa folder.
2) Azure DevOps service connection is created with adequate rights. If you need detailed steps on creating a service connection, visit my previous blog Azure DevOps Service Connection to Azure Resource Manager using Service Principal.
3) The code examples assume that the Azure resource group is already in place.
Building Blocks
Project Structure
Below is how I have structured my project to get a good understanding. I hope it explains itself. But if you want to dive deep, jump to my previous blog, The Project Structure.
root/
|-- .azuredevops/
|   |-- pipelines/
|-- |-- |-- azure-pipelines.yml
|-- env/
|   |-- main.bicep
|-- src/
|   |-- spa/
Infrastructure Code (main.bicep)
The main.bicep contains a simple definition for a storage account. Additionally, it creates a blob container called $web which is going to host our SPA files. It is all you need from infrastructure, and depending on your organisation’s requirements and governance, you may need to alter the storage configuration a bit more.
/*
------------------------------------------------
Parameters
------------------------------------------------
*/
@description('Environment short name.')
param environmentShortName string

@description('Resource deployment location.')
param location string = resourceGroup().location

@description('Name suffix that will be used to build associated artifacts.')
param appName string = 'rkt-spa-ado'

@description('Storage account SKU name.')
param storageSku string = 'Standard_ZRS'

// Tags
param resourceTags object = {
  BusinessUnit: 'Demo'
  Environment: toLower(environmentShortName)
  Project: 'Blog'
}

/*
------------------------------------------------
Variables
------------------------------------------------
*/
var webContainerName = '$web'
var appUniqueName = '${appName}-${substring(uniqueString(resourceGroup().id), 0, 4)}'
var webStorageAccountName = toLower(replace('stg${appUniqueName}web${environmentShortName}', '-', ''))

/*
------------------------------------------------
Storage Accounts
------------------------------------------------
*/
resource appStorageAccount 'Microsoft.Storage/storageAccounts@2022-09-01' = {
  name: webStorageAccountName
  location: location
  sku: {
    name: storageSku
  }
  kind: 'StorageV2'
  tags: resourceTags
  properties: {
    supportsHttpsTrafficOnly: true
    encryption: {
      services: {
        file: {
          keyType: 'Account'
          enabled: true
        }
        blob: {
          keyType: 'Account'
          enabled: true
        }
      }
      keySource: 'Microsoft.Storage'
    }
    accessTier: 'Hot'
  }

  resource blobService 'blobServices@2022-09-01' = {
    name: 'default'
    properties: {}

    resource websiteContainer 'containers@2022-09-01' = {
      name: webContainerName
      properties: {
        publicAccess: 'Blob'
      }
    }
  }
}

output webStorageAccountName string = webStorageAccountName
Important When creating the storage account, ensure not to share this storage account to host your application data. Given that this storage needs to be publicly accessible, it is not a wise idea to host your application data alongside.
Build Pipeline Steps
Build and Package Infrastructure Code
The following is a part of the azure-pipelines.yml file, which takes the infrastructure (main.bicep) code, validates it, packages it, and stores it as an Azure DevOps artifact (env) for later use during deployment.
- job: BuildInfrastructure
      displayName: Build infrastructure
      pool:
        vmImage: ubuntu-latest
      steps:
        # Validate Bicep
        - task: PowerShell@2
          displayName: Validate Infrastructure Bicep
          inputs:
            targetType: inline
            script: "az bicep build --file main.bicep"
            workingDirectory: "$(Build.SourcesDirectory)/env"

        # Publish the Infrastructure artifacts.
        - task: PublishPipelineArtifact@1
          displayName: Publish Artifacts
          inputs:
            targetPath: "$(System.DefaultWorkingDirectory)/env"
            artifact: "env"
            publishLocation: pipeline
Build and Package SPA
The below code snippet in parallel builds and packages the SPA code, in this case, a skeleton React app. The steps may be slightly different, and paths may differ to your framework choice. But the steps remain the same.
- job: BuildSpa
      displayName: Build SPA
      pool:
        vmImage: ubuntu-latest
      steps:
        - task: Npm@1
          displayName: npm install
          inputs:
            workingDir: '$(Build.SourcesDirectory)/src/spa'
            command: install

        # Build SPA.
        - script: npm run build
          displayName: Build SPA
          workingDirectory: '$(Build.SourcesDirectory)/src/spa'

        # Package the Frontend artifacts.
        - task: PublishPipelineArtifact@1
          displayName: Publish SPA
          inputs:
            targetPath: '$(Build.SourcesDirectory)/src/spa/build'
            artifact: spa
            publishLocation: pipeline
Deployment Pipeline Steps
After some initial variable settings, we will examine each deployment task more in-depth.
# Deployment Stage
- stage: DeployDev
  dependsOn: Build
  displayName: RKT-LDZ-DEMO-DEV
  variables:
    environmentShortName: dev
    azureResourceGroup: rg-rkt-ldz-demo
    azGroupDeploymentName: rkt-ldz-demo-deploy
  jobs:
    - deployment: Deploy
      displayName: SPA Release
      pool:
        vmImage: ubuntu-latest
      environment: RKT-LDZ-DEMO-DEV
      strategy:
          runOnce:
            deploy:
              steps:
Deploy Infrastructure
The first task is to deploy the infrastructure, the storage account, to our target resource group. It is simply an AZ CLI Command to deploy a given template to a resource group with some parameters.
# Deploy Infrastructure
- task: AzureCLI@2
  displayName: Deploy Infrastructure
  inputs:
      azureSubscription: $(azureServiceConnection)
      scriptType: bash
      scriptLocation: inlineScript
      inlineScript: |
      az --version
            az deployment group create \
            --resource-group $(azureResourceGroup) \
            --name $(deploymentName) \
            --template-file "$(Build.SourcesDirectory)/env/main.bicep" \
            --parameters environmentShortName=$(environmentShortName)
Set Bicep Output Variables as Pipeline Variables
It is an entirely optional step. But in my example, the storage account name gets calculated within the infrastructure script. So I need it in my following tasks to enable the static website and to upload the SPA output.
One of my previous blog Set Bicep Output Variables as DevOps Pipeline Variables discuss the this more in detail. So I will spare you the time to read all about this at your own pace.
# Set Infrastructure Output Variables as Pipeline Variable
- task: AzureCLI@2
  displayName: Set varaibles from Deployment
  inputs:
    azureSubscription: $(azureServiceConnection)
    scriptType: bash
    scriptLocation: inlineScript
    inlineScript: |
      deploymentOutputs=$(az deployment group show \
      --resource-group $(azureResourceGroup) \
      --name $(azGroupDeploymentName) \
      --query properties.outputs | jq -c 'to_entries[] | [.key, .value.value]')
      echo "$deploymentOutputs" | while IFS=$'\n' read -r c; do
        outputname=$(echo "$c" | jq -r '.[0]')
        outputvalue=$(echo "$c" | jq -r '.[1]')
        echo "##vso[task.setvariable variable=$outputname;]$outputvalue"
      done
Enable Static Website on Storage Account
The following tasks in the pipeline take the storage account created through infrastructure deployment and run the AZ CLI command to enable a static website. Also, in the process, it points sets the error.html page, where it needs to redirect the request if the page is not found (404).
# Enable Static Website
- task: AzureCLI@2
  displayName: Enable Static Website
  inputs:
      azureSubscription: $(azureServiceConnection)
      scriptType: bash
      scriptLocation: inlineScript
      inlineScript: |
      az storage blob service-properties update \
            --account-name $(webStorageAccountName) \
            --static-website \
            --404-document error.html \
            --index-document index.html
Upload SPA into Storage Account
The last step of the deployment is to upload the packaged SPA output content into the storage accounts’ web container, where the request will be served when the website is accessed. Remember, the content is nothing but a bunch of Html, JavaScript and styles. Also, don’t forget to set the --overwrite flag so that when the pipeline runs each time, it will not error out just because the files exist.
# Publish Web Site: Upload SPA content to storage blob container
- task: AzureCLI@2
   displayName: Publish Website
   inputs:
      azureSubscription: $(azureServiceConnection)
      scriptType: bash
      scriptLocation: inlineScript
      inlineScript: |
      	az storage blob upload-batch \
        --account-name $(webStorageAccountName) \
        --destination '$web' \
        --overwrite \
        --source "$(Pipeline.Workspace)/spa/"
Outcome
So that’s what the final outcome going to look like.
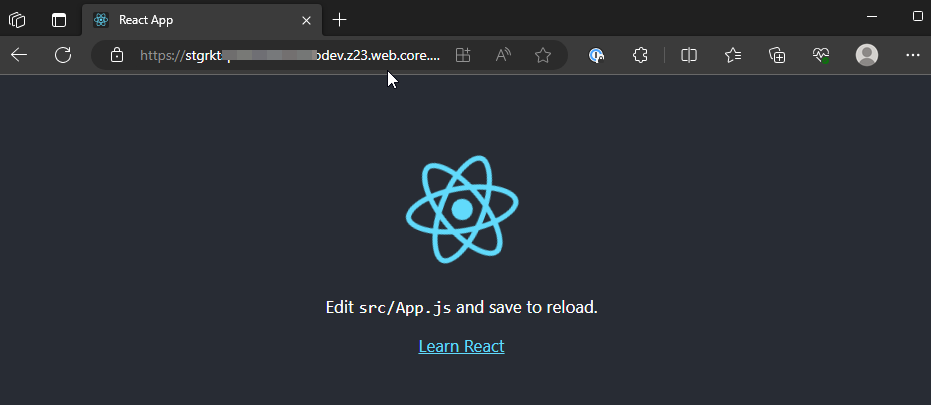
You can get the URL to access your static website from the Static Website blade under the data management section of the storage account.
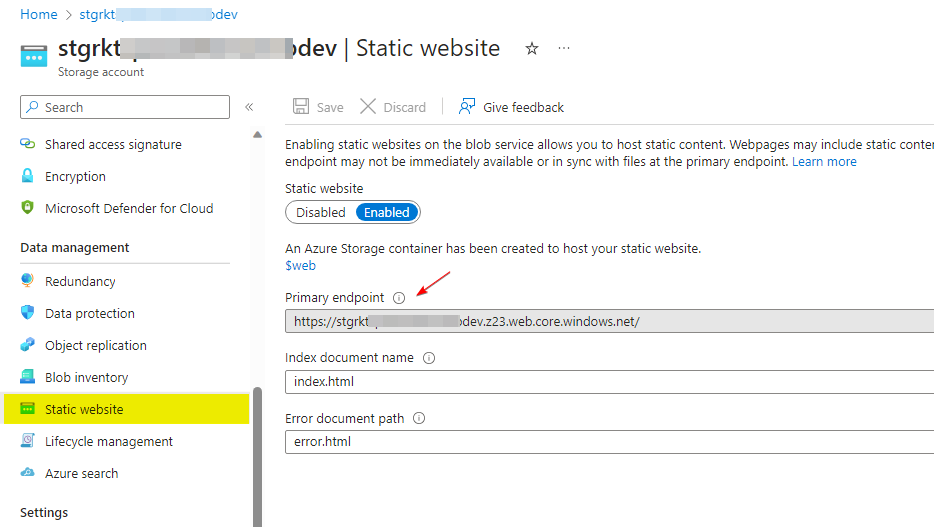
Alright! I know what you are thinking. The URL could be more pretty. Azure gives it based on your storage account name and is entirely out of your control. However, there are ways to configure a friendly, pretty URL for your static website. But that is another day for another post because there are a few more options.
Conclusion
So we just went through the step-by-step building blocks of Azure Pipeline on how to deploy a Single Page Application (SPA) or Static Web pages into Azure Blob Storage. By following this guide and setting up a CI/CD pipeline, you can efficiently manage your SPA deployments, allowing your team to deliver updates and improvements to your web application seamlessly. Azure Blob Storage provides a reliable and scalable platform for hosting static content, making it an excellent choice for SPAs and other static web pages.
Indeed, there are more steps to make it production ready. Hopefully, I will cover those steps in a future blog post. Until then, feel free to shoot a question below if you have any questions.

Leave a comment